Equipment
Paint fill 101

By GolfWRX member HuckleBogey_Finn
To see the original thread the viral discussion in the forums click here
As promised, after much trial and error I believe I have found a very good way to paint fill golf clubs. I will try to be as detailed as possible and I am including a few pics. They were taken with my iphone so the pics arent great, but I am extremely happy with the results. I have tried many paints, solvents and dilutes and this is by far the best combination I have found. I feel anyone can do this. I am sure there are other ways to get good results but this is my preferred way
I appreciate constructive criticisms and feel free to ask questions.
I went with a SF Giants color scheme here. All of you dodger fans can suck it 
First you need the tools. In this example I used Tamiya color paint in smoke, clear orange, clear red, and clear yellow. I also used testors model enamal for the top sight line. You will also need tal strip paint stripper, acetone nail polish remover, non-acetone nail polish remover, 91% rubbing alcohol, q-tips, toothpicks, towels, lint free rags, gloves (you don’t want paint stripper on your fingers!) an old toothbrush and PATIENCE!
To see the original thread the viral discussion in the forums click here

First thing you need to do is get rid of all the original paint. With a q-tip apply a liberal amount of tal strip to all painted areas. Wait 5-10 minutes and you will see blobs of paint bubbling out of the spaces.


To see the original thread the viral discussion in the forums click here
After all of the paint has bubbled out grab the toothbrush and in a sink you dont mind getting stained (or outside with the garden hose) scrub and rinse out all the spaces that had paint in them. The paint should come right out. Sometimes you may have a few remnants hanging around. If so reapply the stripper to these parts until you are left with only bare metal.


To see the original thread the viral discussion in the forums click here
Now take your acetone and give the whole head a good wash scrub. This will remove any oils or remnants of stripper and give you a nice clean surface for the paint. Let it all dry out and now its time to get to painting!
I first use a q-tip to apply a little of the rubbing alcohol to the spaces I’m going to paint. This thins the paint slightly to allow a nice glassy finish when it dries without bubbles. You just need the slightest sheen, not a puddle. This takes practice and it took me a few tries to get right. Now with a toothpick dipped in the paint start applying the paint into the spaces. The paint should “travel” to fill the spaces. If you go outside the lines a little bit thats ok, but start light then work your way thicker. When the paint starts to dry you will get a good feel for how it will finish. If you dont like the opacity, start over. Dont apply a coat over the first.
To see the original thread the viral discussion in the forums click here


The topline of the Kombi s was tough because of the angle. I decided on gloss white here for function over form.

To see the original thread the viral discussion in the forums click here
So now after all the paint is applied (depending on angles and position you may have to wait to do certain sections, but I recommend holding off on clean up until you are all done) you are going to have some over paint. No worries. Just let it all dry. This takes a while. Heat will help acrylic paints, but enamels only dry by oxidation and that takes time. I wait overnight.
After all the paint is dry grab a lint free cloth or used t-shirt and dip it into the non acetone remover. I use the non acetone here because it does the job without the fear of stripping the paint in the grooves. Using light pressure rub the moist rag over the over painted areas making sure not to get the cloth in the painted grooves until all the unwanted paint is gone.
Now you have a DIY custom club. The beauty of this is if you arent totally happy you can do it as many times as you want.
Enjoy the final product.


To see the original thread the viral discussion in the forums click here

Neal Shipley was the first to admit that he enjoyed his food while in college. But since his days at Ohio State, he’s slimmed down and earned a PGA Tour Card.
That hasn’t stopped him from having fun with his wedge stampings, though it’s led to some misunderstandings.
On the 54 (degree), we have ‘Big Fudge,'” Shipley told GolfWRX. “It was supposed to be ‘Big Fridge,’ so this happened a little while ago. ‘Big Fridge’ was a nickname between my college teammates and I, with ‘fridge’ meaning stomach, a big stomach.
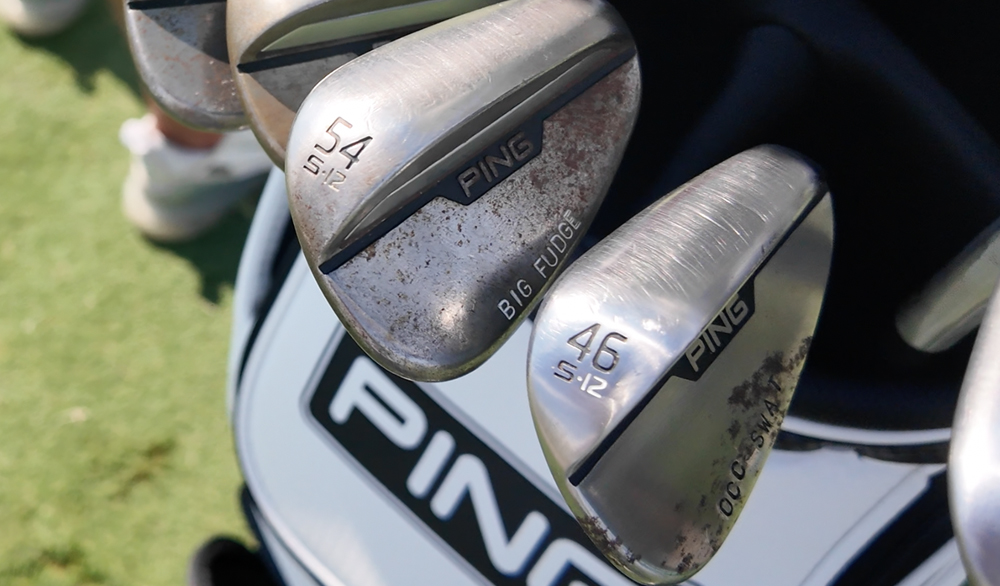
“We told the Ping guys to put … ‘Big Fridge’ on it, and I think maybe some bad cell service or something, and they thought I said ‘fudge,’ so they put fudge on it.”
On Shipley’s 50-degree he also continues the food theme, this time with his go-to order at the “Golden Arches,” and his stamping “DONS 7.”
“The number 7 meal, the two cheeseburger meal, that was my McDonald’s order, back when I would have McDonald’s frequently,” Shipley shared.
At GolfWRX, we are a community of like-minded individuals who all experience and express our enjoyment of the game in many ways.
It’s that sense of community that drives day-to-day interactions in the forums on topics that range from best driver to what marker you use to mark your ball. It even allows us to share another thing we all love – buying and selling equipment.
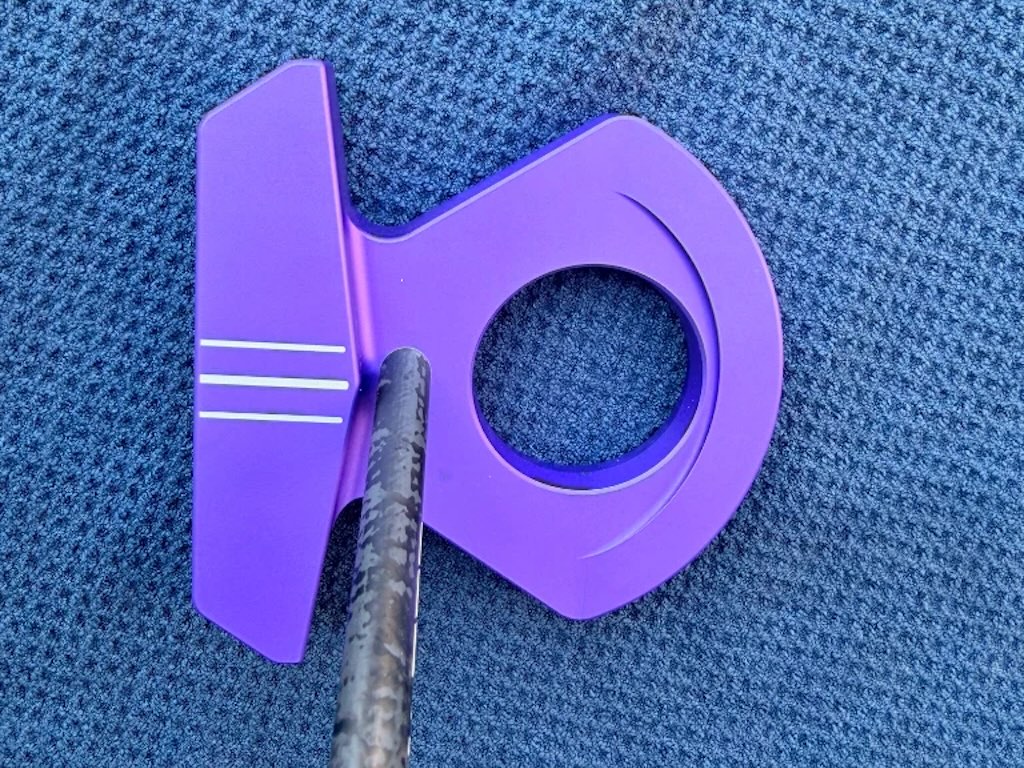
Currently, in our GolfWRX buy/sell/trade (BST) forum, @raw10628 has a L.A.B. DF3 putter and Masters putter cover up for grabs.
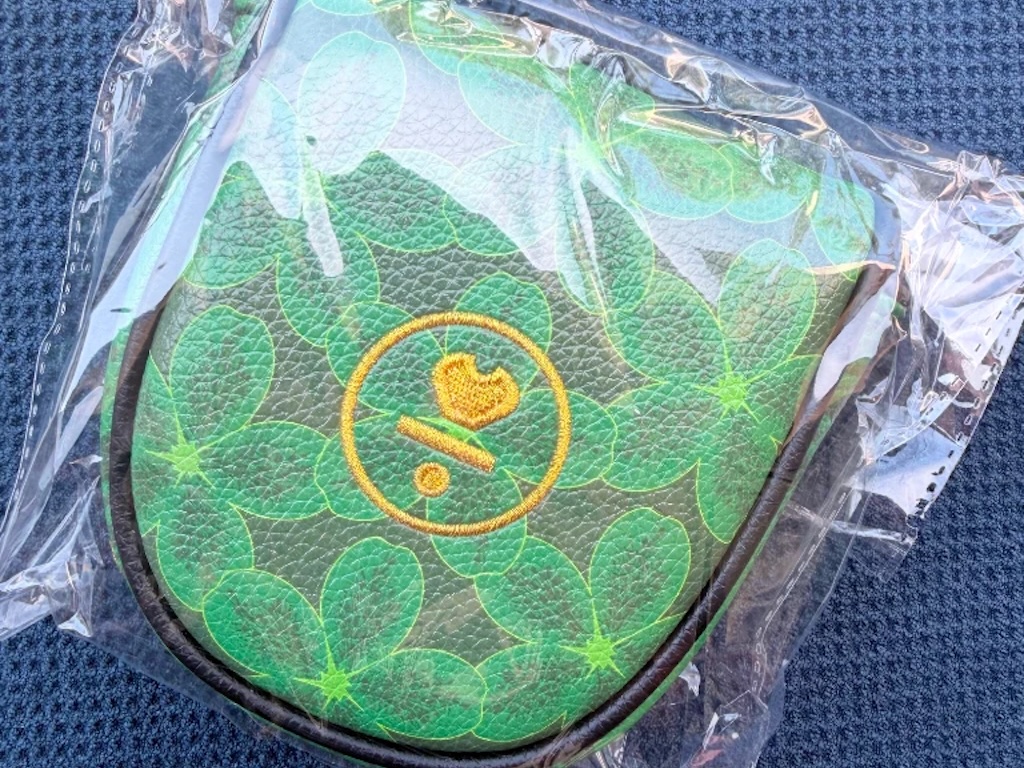
From the listing: “Some great items here today, time to thin out and make room for next set of gear. All prices include shipping.
LAB DF3 Purple 33.5” 68° lie with TPT – $725. LAB Masters release DF3 cover – $150.”
To check out the full listing in our BST forum, head through the link. If you are curious about the rules to participate in the BST Forum, you can learn more here: GolfWRX BST Rules
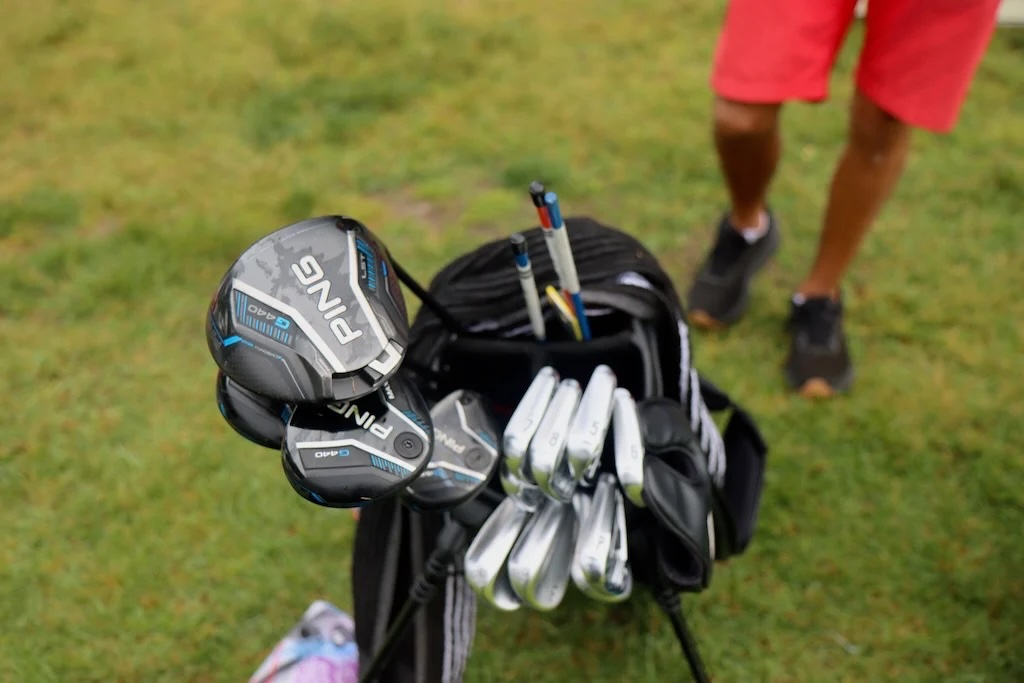
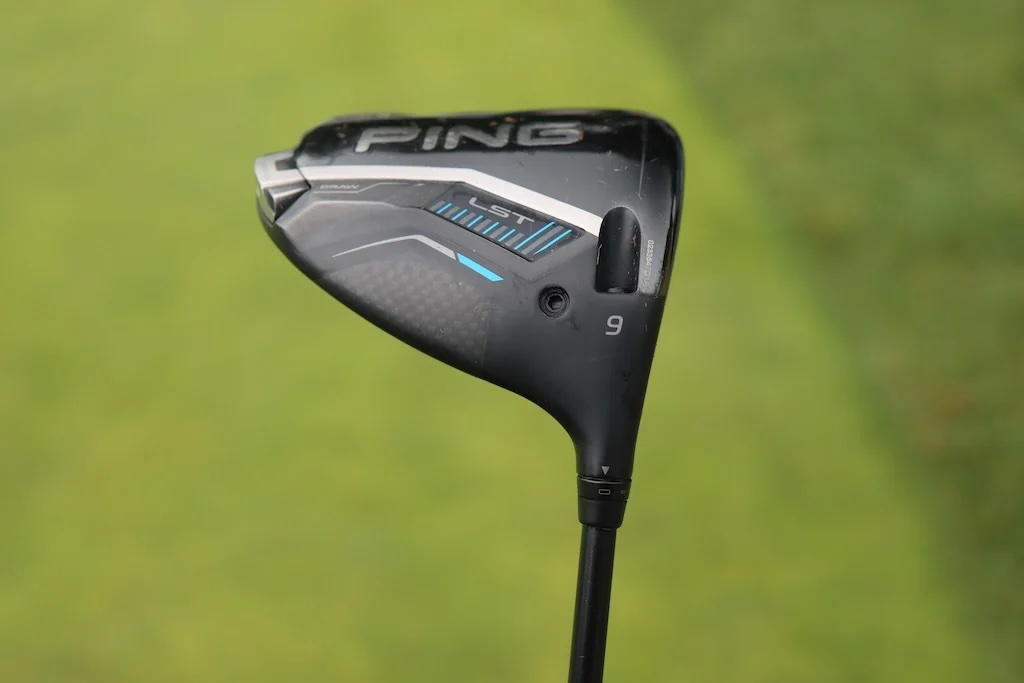
Driver: Ping G440 LST (9 degrees)
Shaft: Accra TourZ Green 5-M4
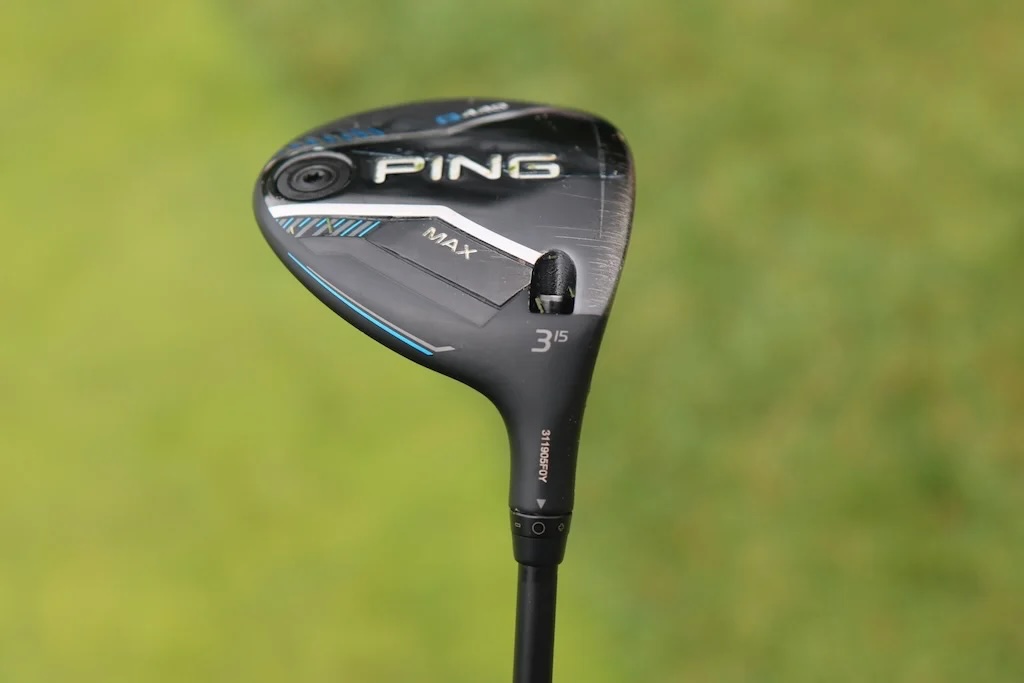
3-wood: Ping G440 Max (15 degrees)
Shaft: Accra TourZ Green 6-M4
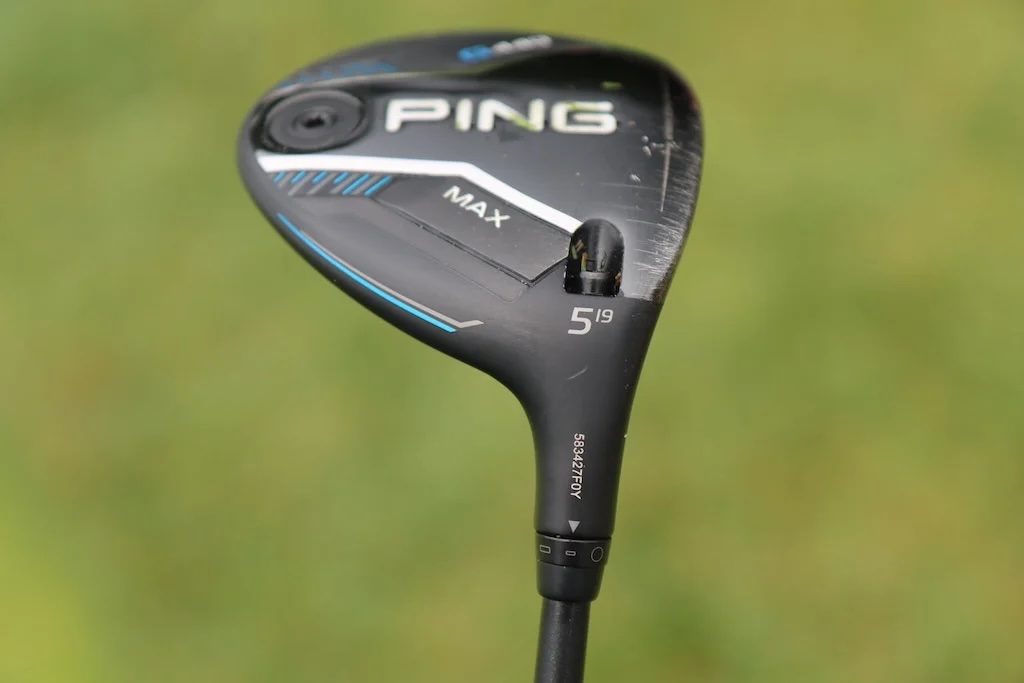
5-wood: Ping G440 Max (19 degrees @18)
Shaft: Accra TourZ Green 6-M4
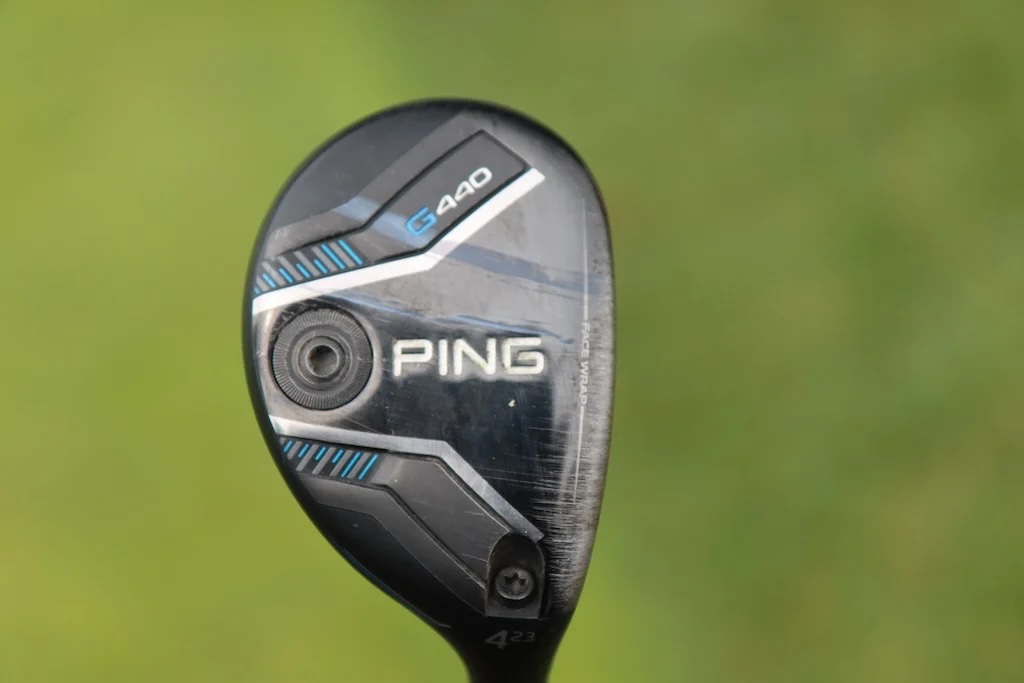
Hybrid: Ping G440 (23 degrees)
Shaft: Oban Isawa Red Hybrid Shaft 04 Flex 70 Gms
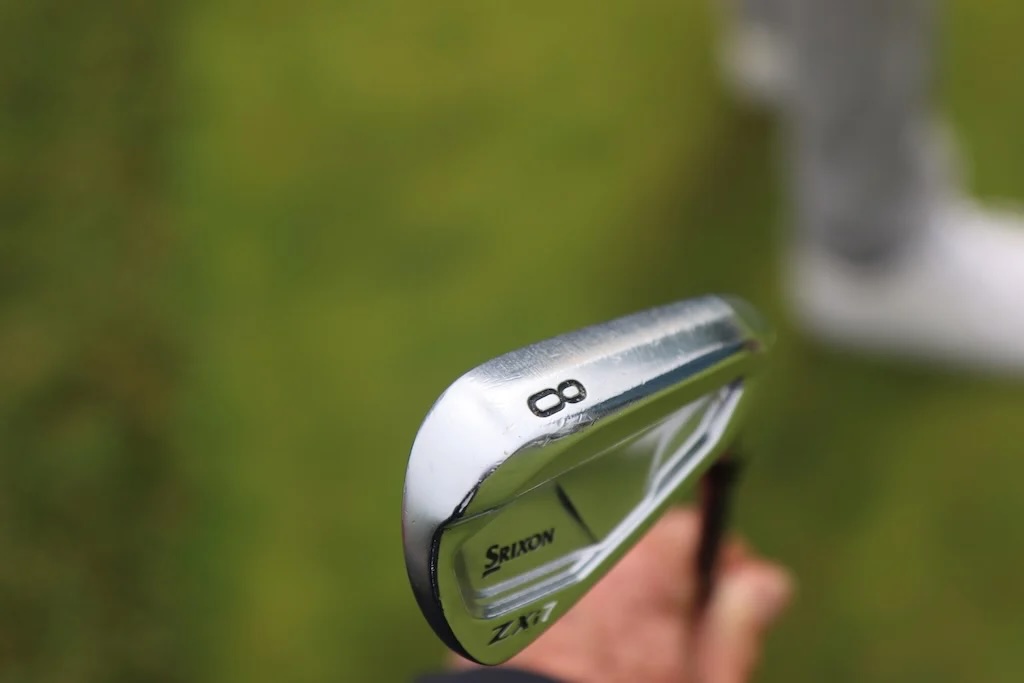
Irons: Srixon ZXi7 (5-P)
Shafts: Aerotech SteelFiber Private Reserve i80
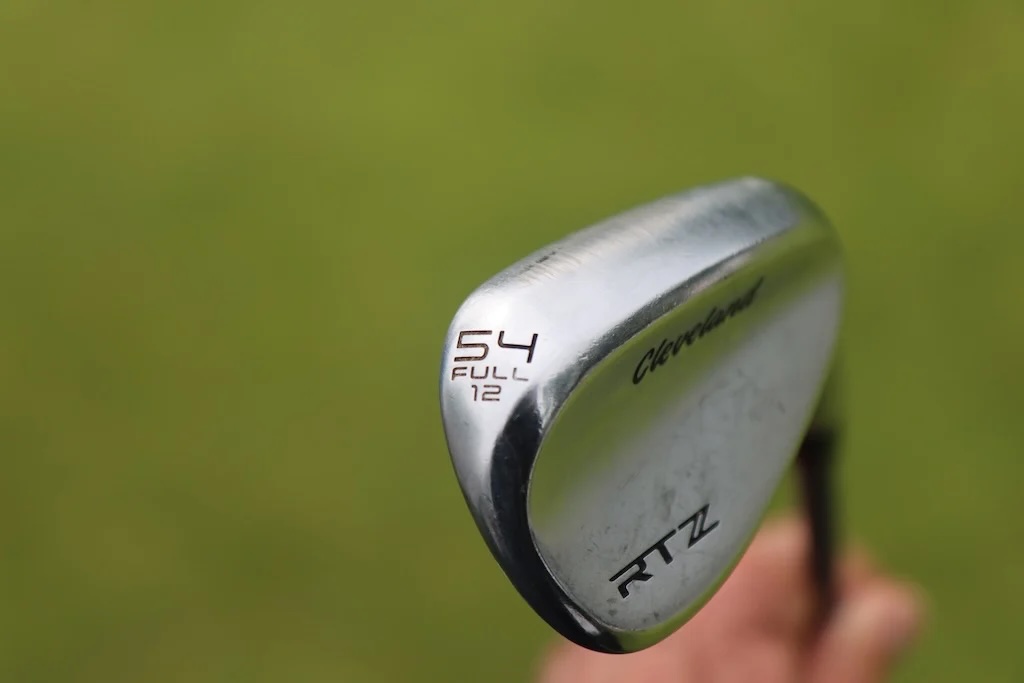
Wedges: Cleveland RTZ (50-MID, 54-FULL, 58-MID)
Shafts: Aerotech SteelFiber Private Reserve i105
Putter: L.A.B. Golf OZ.1i
Shaft: ACCRA Putter Shaft

Grips: Golf Pride Tour Velvet

Aaron Rai’s winning WITB: 2026 PGA Championship

Russell Henley’s winning WITB: 2026 Charles Schwab Challenge

Photos from the 2026 CJ Cup Byron Nelson

CJ Cup Byron Nelson Tour Report: Koepka and Kim’s newest putters finally get hot

Charles Schwab Challenge Tour Report: MacIntyre, Åberg and Spaun all switch putters, TaylorMade launches new Spider

Details on J.J. Spaun’s surprise putter switch

GolfWRX Launch Report: 2026 Titleist GTS drivers

Photos from the 2026 Charles Schwab Challenge

PGA Championship Tour Report: Fitzpatrick, Koepka among big-name putter switches for Aronimink

Photos from the ShopRite LPGA

Maria Torres WITB 2026 (June)
Driver: Ping G440 LST (9 degrees) Shaft: Accra TourZ Green 5-M4 3-wood: Ping G440 Max (15 degrees) Shaft: Accra TourZ Green 6-M4 5-wood: Ping G440...


Eric Cole WITB 2026 (June)
Driver: PXG Lightning Tour Max (9 degrees) Shaft: Project X Titan Yellow 70 TX 3-wood: TaylorMade Qi4D (15 degrees) Shaft:...


Si Woo Kim WITB 2026 (May)
Driver: Callaway Quantum Triple Diamond (8.5 degrees) Shaft: Fujikura Ventus Black 6 X Mini driver: Callaway Paradym Ai Smoke Mini...


Wyndham Clark’s winning WITB: 2026 CJ Cup Byron Nelson
Driver: TaylorMade Qi4D (10.5 degrees) Shaft: Project X Titan Yellow 60 TX 3-wood: TaylorMade Qi4D Tour (15 degrees) Shaft: Project...
Larry
Jul 23, 2012 at 11:18 am
Man, I prefer to just play golf. The more club battle scars the better!
Joe
Jun 28, 2012 at 11:54 am
Great post. I have been doing this for a few years and the rubbing alcohol tip will come in handy. I have repainted the same area many times due to bubbles in the paint. For translucent paints the Tamiya is very good. For opaque paint I have had great success with nail polish. Don’t be scared to customize your stuff, it’s foolproof and you can keep trying until you get it right.
dtowngolf
Jun 21, 2012 at 7:11 pm
nice i inked all my clubs last year including my r11 driver and 3 wood, if you want to check these out here’s a link. Nice job on the Scotty though
http://www.golfwrx.com/forums/topic/682288-inkedpaint-filled-r11-driver-and-3-wood-and-other-clubs-after-a-year-of-use-still-the-ink-is-in-perfect-shapepics/
dan
Jun 21, 2012 at 1:27 pm
Nice stuff and tell them dodgers to eat one!!!!!!!!